














Visual editor
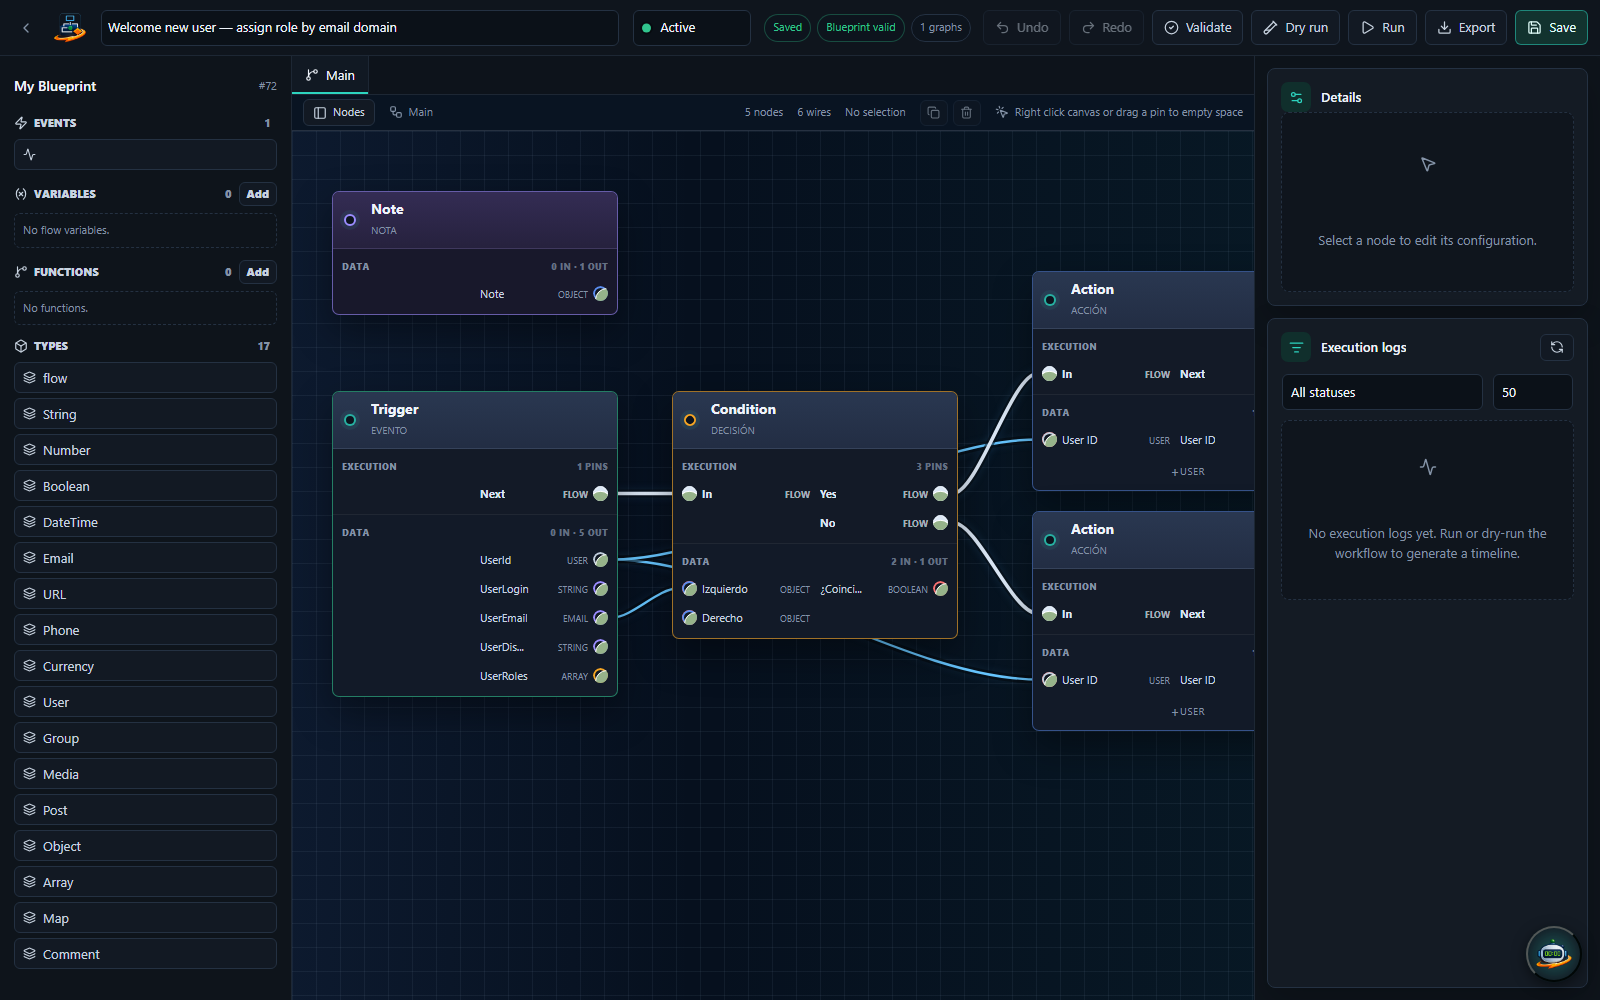
The visual editor is where you build workflows. It is a React application built on top of the Rete framework, embedded in wp-admin at Setyenv → Workflows → [your workflow].
Layout
Three areas, left to right:
- Canvas (center) — the infinite zoom/pan surface where nodes and their connections live.
- Node library (right side panel, toggle with
L) — categorised list of every node available. Drag a node from here onto the canvas to add it. - Inspector (bottom-right when a node is selected) — the config form for the currently selected node. Closes when you click the empty canvas.
Plus a top bar with: workflow title, status toggle (active / inactive), Test run, Run now, Save, more menu (export, import, duplicate, view revisions).
Canvas controls
- Pan: hold space + drag, or scroll with two fingers on a trackpad. The canvas is infinite in both dimensions.
- Zoom:
Ctrl+ scroll (orCmdon macOS). The minimum zoom fits the entire graph; maximum zoom shows individual nodes at 200% size. - Fit to view: press
Fto fit every node into the visible viewport. - Auto-layout: press
Alt + Lto run the dagre layout algorithm on the current graph. Useful after importing or after a messy drag.
Connecting nodes
Each node has typed output handles (small circles on the right side) and typed input handles (on the left). Drag from an output to an input to create a connection.
- Type checking: if you try to connect a
stringoutput to anumberinput, the connection appears red and the workflow won't save. The editor tells you which types it expected. - Multiple outputs: a node like a Condition has multiple outputs (
true/false). Each output can have multiple downstream connections; they all receive the same payload. - Multiple inputs: most nodes have one input. The ones that accept multiple (e.g. Merge) take an array of payloads in arrival order.
Configuring nodes
Click a node to open its inspector. The fields shown are specific to each node type (see Nodes catalog for the per-node reference).
Token references are the connective tissue: any string field lets you reference data from upstream nodes with {{node_id.field_path}} syntax. The autocomplete dropdown shows every upstream node and the fields it exposes. Example:
{{trigger.order.total}}— the order total from the trigger.{{condition_1.matched_rule}}— which rule of a condition matched.{{ai_1.completion}}— the text the AI node returned.
Testing
- Test run opens a dialog with a JSON editor pre-filled with a sample trigger payload for the trigger you selected. Edit the payload, click Run; the full execution timeline opens inline. Failed nodes are highlighted red with the error message.
- Run now (only for workflows already active) executes the workflow against the LAST real trigger payload it received, useful for "re-process this real event" debugging.
Keyboard shortcuts
| Key | Action |
|---|---|
Space + drag | Pan canvas |
Ctrl + scroll | Zoom |
F | Fit to view |
Alt + L | Auto-layout |
Cmd/Ctrl + S | Save workflow |
Cmd/Ctrl + Z | Undo |
Cmd/Ctrl + Shift + Z | Redo |
Delete | Remove selected node(s) |
L | Toggle node library |
? | Show this keyboard shortcuts list |
Performance
The editor handles graphs of up to ~500 nodes smoothly on a modern laptop. Beyond that, browser frame rate drops. If your workflow is genuinely that large, consider splitting it into sub-workflows called via the Call function node — easier to read AND faster to render.